Monday, 18 March 2013

Vernal Pools in the Town Forest

It's the middle of March now, so we took a field trip to Needham's Town Forest to look for vernal pools.  Very soon, these pools will be visited by breeding amphibians - frogs, toads, salamanders.  A "vernal pool"  is a small pond that forms in woods in the spring from melting snow and spring rains.  These are good places for amphibians to breed because they dry up or shrink a lot in summer, so fish usually cannot live in them, and fish love to eat amphibian eggs!  The eggs hatch and then the tadpoles grow and develop into their adult forms before the pool dries up. 

The earliest arrivals to vernal pools around here are yellow-spotted salamanders and wood frogs.  They are expected between the middle of March and the end of the month.  The first warm, rainy night in this breeding season is a good time to look for salamanders and wood frogs heading to the pools.  They lay jelly-like eggs that stick together in egg masses in the water..  During breeding season, you can often locate a vernal pool by listening for what sounds like ducks quacking, but you don't see any ducks - those are wood frogs calling!


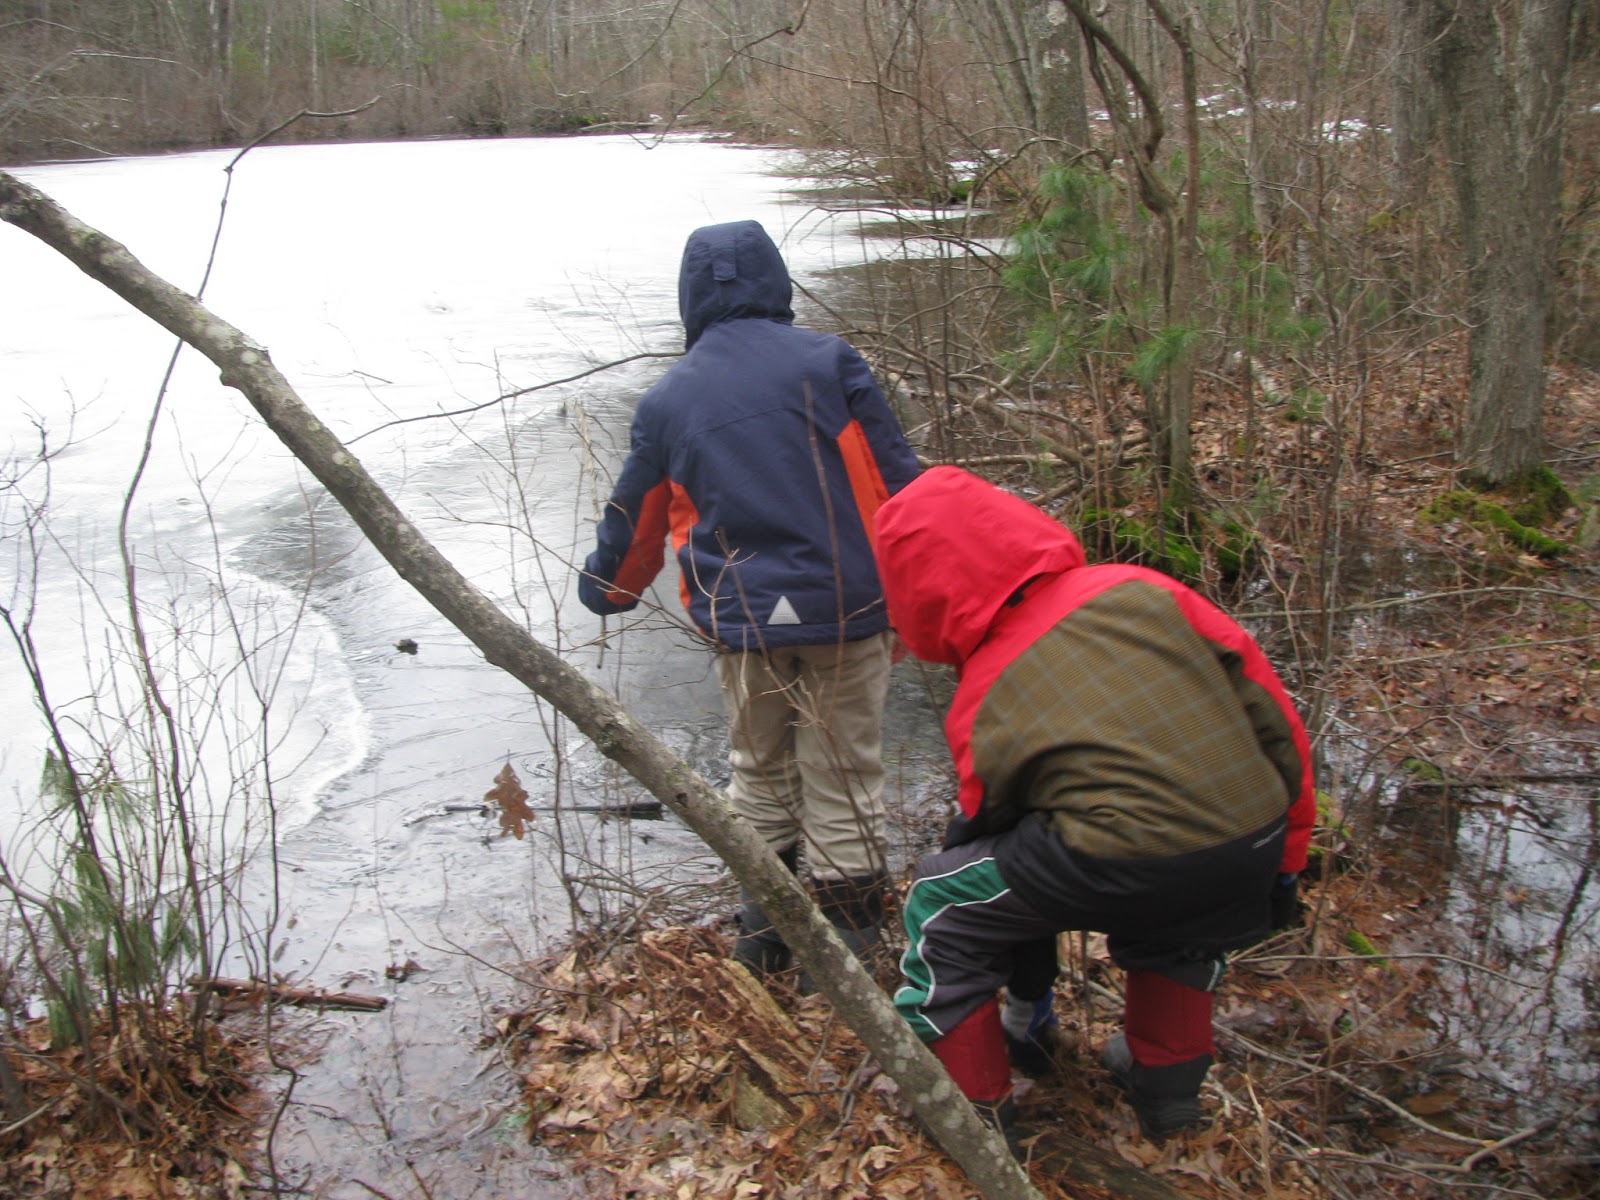
www.northrup.org We drove to the Robinwood Ave. entrance to Town Forest.  The first thing we noticed in the forest was a rushing stream near the entrance.  We explored along it and crossed it on a log.  There was a lot of long, bright green algae growing on the rocks.  It streamed out like green hair in the stream's flow.  Then we followed a trail toward a small pond where our instructor had found wood frog eggs in past years.  On the way there, our instructor pulled out a deer's skeletal leg that she found in this spot 2 days ago and had hidden.  It was cool to check it out.  We wondered how the deer had died, but didn't find any clues on the leg.  The leg might have gotten separated from the rest of the deer's bones by a dog finding it and carrying it away to chew on and play with.


At the pond we checked out the edge, but the middle was still iced over and we decided that there would be no amphibian eggs there yet.  We sat on a log and had a snack of popcorn while our instructor showed us pictures of spotted salamander and wood frogs, and talked about vernal pools.


Then we followed the trail to a much smaller vernal pool.  We found a large slug in there.  It looked like it had drowned.  This pool was shallow enough to see to the bottom very well.  We also found an "oak apple gall" and learned how a small wasp had laid an egg on an oak leaf.  The egg hatched and the tiny larva started eating and the leaf then grew a rounded growth over this irritation.  This growth is a gall, and the larva developed in it.  When it developed into an adult, it then chewed a hole in the gall to get out.

Next, we followed a trail to an unusual and cool place in this forest.  You'll have a ask a Green Ranger about it!  The trail went up and down over rocky hills and we crossed a wooden bridge over a stream.  We arrived at our destination, and after checking out all of the interesting things there, we had hot chocolate with marshmallows!  We followed a stream downhill and explored the wetland that formed below.  Skunk cabbage was blooming.  It is a very early wetland bloomer with a thin, rod-like flower inside a mottled purplish "hood" (spathe).  It has a slightly stinky smell and is very unusual because it can create its own heat (thermogenesis).  The smell and, probably the heat as well, attract early pollinators - flies and beetles. (see picture of skunk cabbage below.) We also found a red-backed salamander and a red eft (land-living part of the newt's life cycle) under a log! Then we had to hurry back to get to the Science Center for pick-up time.  


www2.mcdaniel.edu


Monday, 4 March 2013

Celebrating the 40th Anniversary of the Endangered Species Act

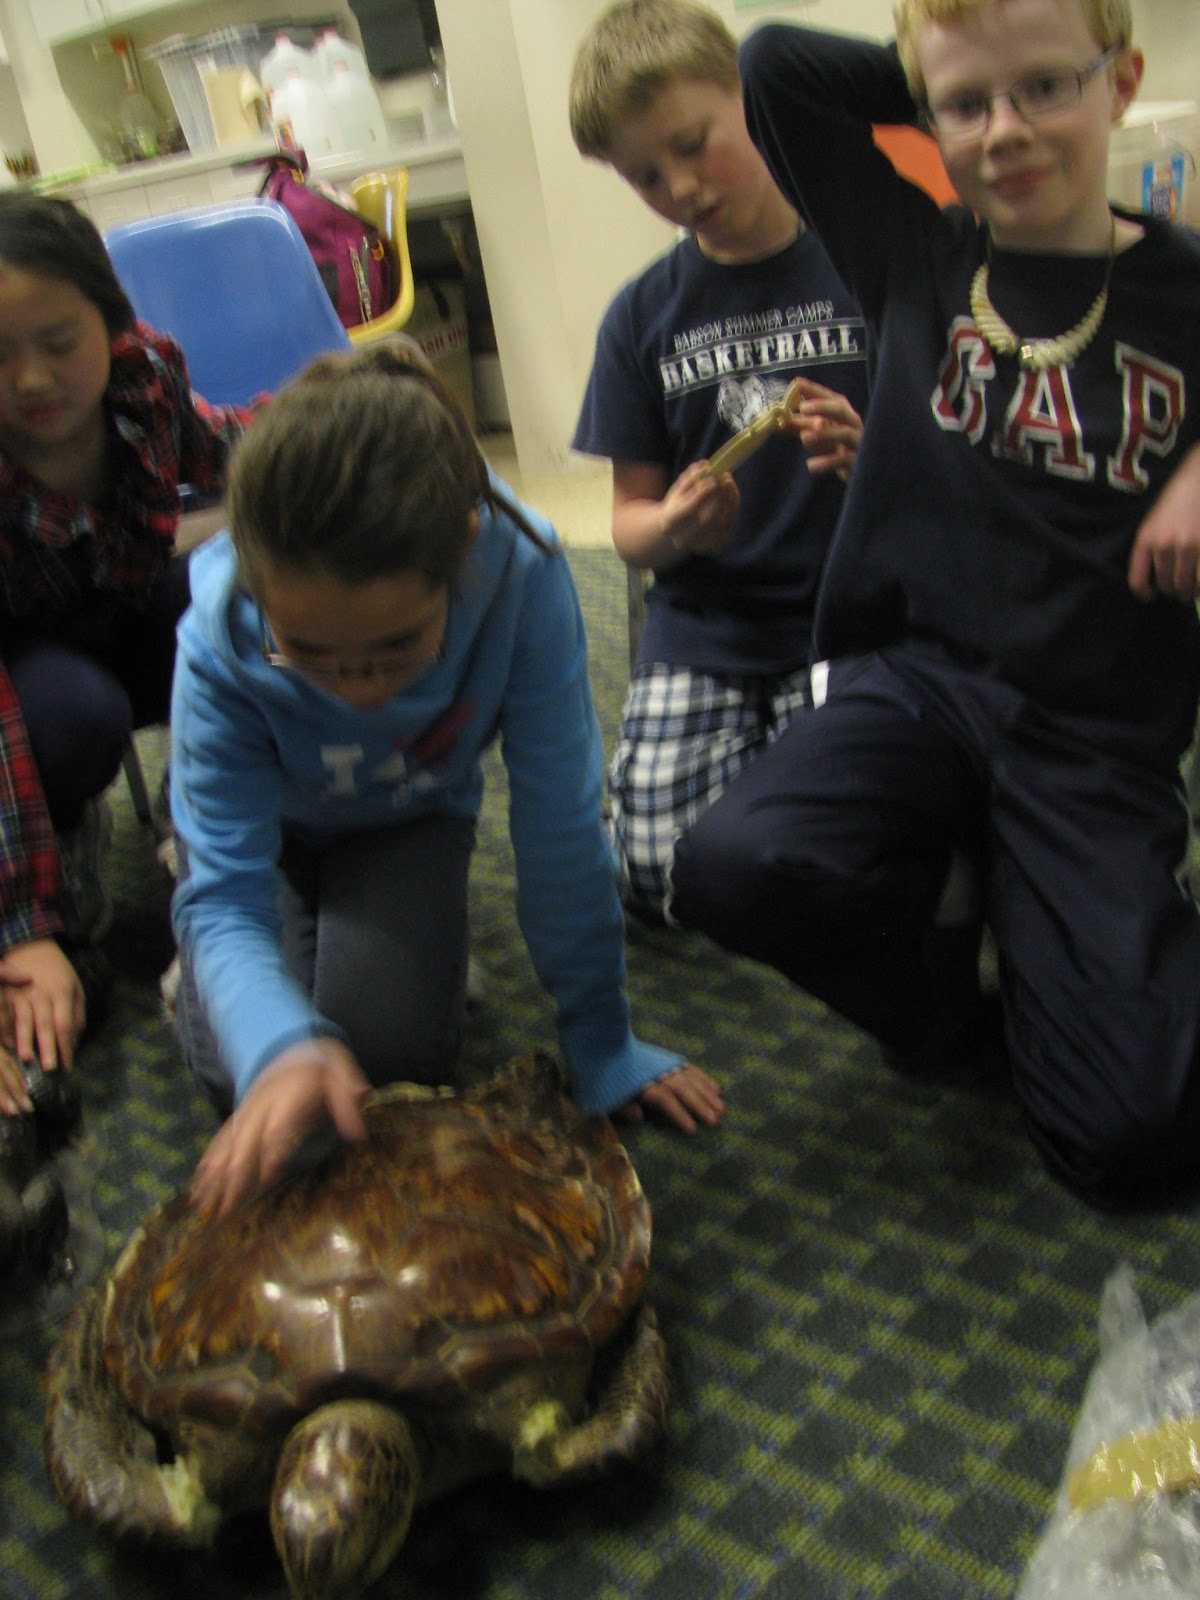
During this class meeting we focused on the Endangered Species Act because this year it is 40 years old!  We learned what the act is, what its goals are, how species are "listed," what the different categories of listing are, what causes species to become endangered and we learned of some successes where species have greatly increased their numbers.  We also learned about some species that are listed by the Fish and Wildlife Service in our own state of Massachusetts.  Although plants are on both the national list and the state list, we focused on animal species. Our room was decorated with posters of endangered species of animals. We also got to examine and touch some parts of endangered animals that have been confiscated from illegal trade by the Mass. Fish and Wildlife Service.  These were loaned to the Needham Science Center for educational purposes.

The Endangered Species Act (ESA) was signed into law by President Richard Nixon in 1973.  Its purpose is to prevent the extinction of plant and animal species and to increase the populations of vulnerable species.  Candidate species must be identified and if they become officially listed, an important part of protecting them is to protect their habitats and travel corridors.  The species most vulnerable to extinction are listed as "endangered," while other species on the list are listed as "threatened."  We learned that individual people and organizations can play a role by requesting that particular species become candidates for listing.  (The US Fish and Wildlife Service and the National Marine Fisheries Service also identify species for possible listing.)  There is a long process of review and study for a species to be officially listed.  Right now there are more than 2000 species listed.  ESA is pretty complicated, but overall it gives much needed protection for these species.  We learned that violations of the law can lead to large fines or possibly to imprisonment.


ESA has had some very positive effects for some well-known species.  We played a guessing game where we each wore party hats stapled with different pictures of animals that have benefited by the act.  We did not know what animal was on our own hats, but could see the other hats on our classmates.  We asked each other questions like, "how does my animal move," "what does my animal eat,"  "what habitat does my animal live in," in order to guess the animal on our own hat.  Then we gathered together and learned how each of these animals became endangered and how ESA has helped them recover to larger numbers.  Some of them have recovered enough to be removed from the list.  The animals on our hats were:
American alligator
Bald eagle
Humpback whale
Gray wolf
Black-footed ferret
Grizzly bear
Atlantic green sea turtle

Then we examined some items confiscated by the Mass Fish and Wildlife Service and loaned to the Needham Science Center:
Elephant tusk
Ivory necklace
Ivory letter opener
Dwarf crocodile (taxidermy mount)
Green sea turtle (taxidermied)
Hawksbill sea turtle (taxidermied)
Tortoiseshell eyeglasses
Jaguar pelt
We were very disappointed to learn that people would want to own these things for decorations and prestige.


We sang "Happy Birthday" to the ESA, blew out candles on our cupcakes and ate them! We agreed to submit a letter about ESA to our local weekly newspaper

Then we played another guessing game.  This time, we focused on endangered animals in Massachusetts and this time we each knew our own animal (from a folder with the animal's picture and info inside), but no one else knew which animal we had.  Then we took turns being questioned by our classmates until they could get as close as possible to our animal - most were hard to guess exactly!  These were the animals in our folders:
Timber rattlesnake
American burying beetle
Shortnose sturgeon
Indiana myotis (bat)
Peregrine falcon
Short-eared owl
Ebony boghaunter (dragonfly)
Bog turtle

Last, we created a large poster to celebrate the ESA.  It hangs in the window of the Science Center.  We used many photos of endangered animals cut from wildlife calendars.

These are sites where you can learn more about the Endangered Species Act:

US Fish and Wildlife Service:  www.fws.gov
National Oceanic and Atmospheric Administration:  www.mnfs.noaa.gov/pr/species
Center for Biological Diversity:  www.biologicaldiversity.org/campaign/esa

Thursday, 21 February 2013

Outdoor Estimations and Bird Feather Investigations

Deep snow kept us from spending a lot of time outside.  We did check out the frozen pond in the Eastman Conservation Area behind Newman School.  While we stood on the dock, we could see the hill at the Needham RTS through the woods across the pond.  The sun was not far above the hill.  We learned a way to estimate the time until the sun is hidden by a distant hill or treeline or an ocean horizon.  Here's how:
  • Do not look directly at the sun!  You can see it without looking right at it.
  • Hold an arm straight out in front of you and bend your wrist so that your palm is facing you and your fingers are pointing to the side (parallel to the ground). 
  • Close your fingers against each other and either bend your thumb into your palm or bend it up to the sky. (You don't need your thumb for this estimation, so you are getting your thumb out of the way.)
  • Position your hand so that your top finger (index finger) appears to "touch" the bottom of the sun.
  • Count how many fingers there are between the bottom of the sun and the hill (or treeline, or horizon).
  • If you need more fingers, hold out your other arm as well and stack your hands, with the index finger of the new arm touching the pinky of the first arm.  Add up all of the fingers that lie between the sun and the hill (or treeline, etc.)
  • Each finger represents 15 min.  Multiple the number of fingers by 15 to find the total number of minutes until the sun is no longer visible.  

We found that the sun would "set" behind the hill in 90 min from the time that we stood on the dock.

As we headed back to the school, we faced a large tree behind the school and learned a way to estimate its height.  Before we had come outside, we measured the height of two students in our class.  Here's how we estimated the tree's height:
  • One of our measured students stood at the base of the tree, while the rest of us stood farther away (maybe a hundred feet or so; no specific distance is required).
  • We held a pencil (positioned vertically) at arm's length, with the student in the distance right "behind" the pencil.
  • We positioned the pencil so that the top of the pencil's eraser was at the top of the distant student's head, and we shifted our fist on the pencil so that the distant student's body was covered by the part of the pencil above the fist (still having the eraser end "touching" the top of the student's head.)
  • We used this part of the pencil (above the fist) as a unit of measure and moved our arm with this unit "up" the tree in the distance until we reached the top.  
  • Then we multiplied the number of pencil units we used by the student's height.  Then we did this again with the other student we had measured inside to double-check the estimated tree height.
Both of our measurements came very close to 40 feet.  (One of us did this calculation in the snow with a stick!)

Back inside, we warmed up with hot chocolate as usual and then did a feather "lab."  Here's what we did:

  • Our instructor passed out "flight feathers."  These were turkey wing feathers from a craft store.  She also passed out "down feathers" which were goose feathers, also from a craft store.  Our tools were hand lenses, microscopes, toothpicks and toothbrushes.
  • We learned the parts of a feather:  shaft and vanes (made up of barbs and barbules).  
  • We passed our fingers under the ends of the shafts and saw that we could see dimly through the shaft because it is hollow - great for not adding much weight to a bird. 
  • We examined the asymmetry of the feather (one side of the vane narrower than the other), and the curve of the feather (from one side of the vane to the other).  We learned that the feather is an airfoil like an airplane's wing.  Our instructor turned on a hairdryer and aimed the "wind" at our feathers as we held them horizontally with the end of the shaft held loosely in our fist (narrower vane closer to the hairdryer).  We could see and feel how the feather would lift because of the air flowing faster over the airfoil and slower underneath.  When we turned the feathers over and again turned the "wind" on them, they would immediately flip over.  
  • Then we held our flight feathers close to our ears, and while we were silent, we listened as we pulled apart barbs of the vane.  We could hear them "unzipping!"  Under the hand lenses and microscopes, we did this again and saw that the barbs are small, individual parts of the feather's vane.  Each barb has "hooks" called barbules (we could see them!) that hook it to the neighboring barbs. The "unzipping" sound we heard was the hooks pulling apart. When barbs are neatly hooked together, this helps the feather to be a smooth,solid unit which helps with flying.  
  • We used toothbrushes to "preen" the feathers so that the barbs would again be interlocked.  We learned that birds use their beaks to preen their feathers, sort of the way we did with toothbrushes.  They also apply oil from a gland found near their tail.  
  • We examined the soft, downy feathers and found that they did not have barbules to hook the barbs together.  that's why they are soft and downy.  We learned that these feathers are for insulation, to keep birds warm, so interlocked barbs are not needed; down feathers aren't needed for flight.
  • We learned that hummingbirds may have only 1000 feathers, while swans may have 25,000!
  • We dropped a few drops of water on the flight and down feathers and pressed the drops down.  The flight feathers did not absorb the water; it beaded right up.  The down feathers did absorb the water.  
  • We learned that it is illegal to collect wild bird feathers that we may find outside.  An exception may be made for feathers from game birds that have a hunting season.  We were able to examine wild turkey (game bird) feathers.  Looking at pictures of turkeys in flight, we were able to identify the parts of the bird where the feathers came from. 

Saturday, 9 February 2013

Evergreens in Winter

This class took place the day before a blizzard was expected, so we had deep snow on our minds as we searched for evergreen trees and thought about their importance to wildlife in winter.  First, they provide food.  For instance, deer eat the twigs and needles as high as they can reach.  We found raggedly nipped off small branches on the evergreens along our walk.  Rabbits also eat the greenery that is low to the ground.  We were surprised to learn that porcupines can spend a couple of weeks in a single hemlock tree feeding on the bark and twigs.  Also, the seeds found in cones (or dropped by them), including the blue berry-like cones of red cedars, are a good source of food for red squirrels (and flying squirrels?), chipmunks and numerous birds such as chickadees and nuthatches.

Evergreens are also important in winter for the shelter that they provide.  Birds may roost among the branches, red squirrels may nest in them, deer-mice may re-use a bird's nest, and an evergreen grove is a favorite place for deer to have a winter "yard" where they rest away from high winds and deep snow.  The snow is not as deep under evergreens as it is out in the open or under deciduous trees such as oaks and maples.  Dense evergreens cut down on cold winds reaching animals sheltering inside. 

On our walk we found white pine, balsam fir, another kind of fir that we did not identify yet, and 3 kinds of cedar.  We smelled the balsam needles and crushed the scaly cedar needles for a very different smell.  We also found several deposits of deer scat, some rabbit scat and a fox or coyote scat.  One of the things that we encountered was a small wetland that was frozen over.  It was very solid and shallow (a few inches), so we have a lot of crazy fun sliding around, exploring, and playing on the ice.  On the way back to the school, we found ice in the crevices of some large rocks in front of the school.


Back inside, we examined samples of evergreens: white pine, 2 firs, 3 cedars and 1 hemlock.  We noticed that pine needles are longer and are grouped together, joined at one end where the needle packet is attached to the twig.  Hemlock and fir needles, on the other hand, are shorter and attached separately to the twigs.  Cedars have scale-like needles that fan out in pretty patterns.  We learned that fir needles are kind of soft compared to spruce needles.  We had to take our instructor's word on that because we did not find any spruce.  We saw that hemlock and balsam needles have white lines on the underside.  All evergreen needles have a kind of waxy coating that helps the trees conserve water in winter.  Winter is pretty much a drought time for trees because water is "locked up," frozen in the ground and in snow. 

We used small snipped up twigs, and packets of needles to decorate pencil containers.  Here is what you need:
  • evergreen twigs and needles
  • strip of paper (cut to size that can wrap around a can)
  • cleaned soup (or other) cans
  • laminator or clear contact paper
  • scissors
  • scotch tape 
  • pencil or marker
  • glue stick
We glued the twigs and needles on the paper and labeled them (balsam, hemlock, etc.).  Then we laminated the decorated paper, cut off the excess laminator plastic, wrapped the can and taped the paper's ends. Easy!